Jun 05

Home Automation System – An engineering project (EE5)

Just as I did with our previous projects I’m going to elaborate on the ‘Engineering Experience’ project we’ve done this semester. We opted to build a home automation (Domotica) system from scratch. We, a team of 4 (clicky & clicky) electronics students at Group T University College, spent the last five months or so developing and building a system that, in theory, could be used to control and sense stuff in your house. Here’s some explanation on both hardware/electronics and software.

Hardware

The essential hardware (excluding sensors such as temperature sensors, light sensors, switches, …):

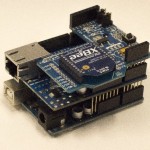
We made a ‘sandwich’ of the Uno, Ethernet and XBee shields which acts as the core, the central coordinator or access point. From here all data is received from and sent to modules around the house. Thanks to the Ethernet connection, a MySQL database is hooked up and a webinterface is able to check and control the entire system. Unfortunately the Uno only has one serial IO channel, which caused some problems in the end due to both shields being connected to that one line. We fixed most of them by software filtering but looking back it would’ve been easier if we had for example an Arduino Mega, which has 3 serial channels.

Module End Device

Module End Device

Arduino Uno - Ethernet Shield - XBee Shield stack

Uno, Ethernet & XBee Shield 

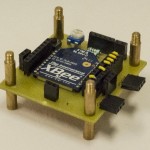
As you can see on the left, the end device “module” is something we designed ourselves. An XBee is used to send over sampling data to the Access Point and to receive commands (set a digital pin to logical 1 or 0).

You can easily attach sensors to any of the 8 available XBee pins (which can be set either to DIO or ADC).

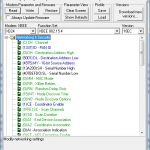
The programming of the XBee devices is done with a tool developed by Digi called X-CTU. We started out with a serial terminal to program the XBees but quickly switched to a more user-friendly application.

X-CTU

X-CTU

This program can be used to quickly change some parameters in the XBee’s firmware. The firmware can also be easily upgraded, which is a great thing since Digi seems to release a newer version every couple of months that introduces more features for the device.

Software

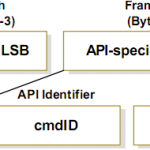
XBees can either be used in transparent or API mode. For more complex actions one quickly leaves the simple transparent mode behind and uses the somewhat more complex API mode. This mode uses packets (frames) of data to send over information.

XBee API packet

XBee API packet

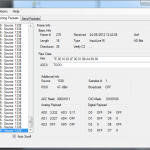
XBeeP

XBeeP

This was quite the challenge to be able to read the data, making sense of it and being able to use it to interpret voltages and status information. That’s why I developed a simple packet parser program in C# that quickly transforms any received data packet into human readable form. And so XBeeP was born!

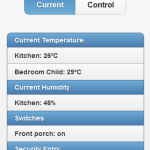
We transfer data to and from the database by  letting the Arduino do PHP GET requests. Packet data is assembled and parsed on the webserver which translates it into usable information that can be shown on an interface. For ease of use we developed both a regular website and a mobile version with jQuery mobile.

Mobile Interface

Mobile Interface

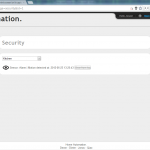
Regular interface

Regular interface

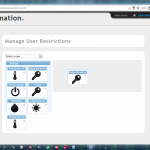
User Restrictions

User Restrictions

With these bits of software, the possibilities are nearly endless, you can create cron jobs or do a check every time the Arduino fetches a page to automate things like turning on the lights when it gets dark. We’ve added a scheduler where you can set actions to be performed at a certain time. These can also be set to be repeated daily or weekly.

Some other features the webinterface has:

  • User rights management (see screenshot above)
  • Easy overview of your switches and the option to turn them on or off
  • Temperature/humidity graph
  • Motion Detection notifications

Conclusion

This was always just a proof of concept project but it turned out to be pretty usable. Of course, for a commercial project a lot more security would be added as well as the usage of “confirmation” packets a module would send to the access point to notify it has correctly received a command. Some more checksum calculations should be added as well to make sure there is no corruption of information along the way.

To conclude, if you look at Twine, which is somewhat similar I think this project is a beautiful example of home automation systems that allow a lot more interactivity between the system and its users. A funfact here is that if our project would be an actual commercial product on the market it would be cheaper than a Twine with something like $30 to $50 per module and $100-150 for the central access point.

Update: more photos of the finished product can be found at http://ee5.crombeen.be/
May 25

Assembling an XBee API packet in PHP

In a previous post I showed how to parse an XBee API packet in C and PHP, for my project I needed both parsing and assembling of such packets. In case anyone would want to use it, here’s the PHP code for when you want to manipulate DIO pins.

function assemblePacket($module, $pin, $pinVal)
{
  $sum = 0; // checksum variable
  $packet = "<";
 
  if ($pinVal)
  { 
    $pinState = "05";
    $pinchk = 0x05;
  }
  else
  {
    $pinState = "04";
    $pinchk = 0x04;
  }
 
  $packet .= "7E"; // Start byte
  $packet .= "00"; // MSB length
  $packet .= "10"; // LSB length
 
  $packet .= "17"; // Remote AT command request
  $sum += 0x17;
  $packet .= "00"; // No response packet  
  $packet .= "00"; // 64bit address ignored Byte 1
  $packet .= "00"; // 64bit address ignored Byte 2
  $packet .= "00"; // 64bit address ignored Byte 3
  $packet .= "00"; // 64bit address ignored Byte 4
  $packet .= "00"; // 64bit address ignored Byte 5
  $packet .= "00"; // 64bit address ignored Byte 6
  $packet .= "00"; // 64bit address ignored Byte 7
  $packet .= "00"; // 64bit address ignored Byte 8
 
  $packet .= $module; // Module MSB and LSB
  $mbytes = str_split($module, 1);
  $sum += base_convert(getVal($mbytes[1]), 10, 16) + (base_convert(getVal($mbytes[0]), 10, 16) << 4);
  $sum += base_convert(getVal($mbytes[3]), 10, 16) + (base_convert(getVal($mbytes[2]), 10, 16) << 4); 
 
 
  $packet .= "02"; // Apply changes immediately
  $sum += 0x02;
  $packet .= "44"; // Character D in HEX
  $sum += 0x44;
  $packet .= (string)(30 + $pin); // Pin value, 0 in hex is 30
  $sum += dechex(30+$pin)+30;
  $packet .= $pinState; // Pinstate
  $sum += $pinchk;
  $checksum = 0xFF - ( $sum & 0xFF);
  $hack = str_split(dechex($checksum), 1);
  echo $hack[0];
  echo "     ";
  echo $hack[1];
  if(ctype_alpha($hack[0]))
    $packet .= strtoupper($hack[0]);
  else
    $packet .= $hack[0]; 
  if(ctype_alpha($hack[1]))
    $packet .= strtoupper($hack[1]);
  else
    $packet .= $hack[1];         
  $packet .= ">";
  return $packet;  
} 
 
function getVal($c)
{
   if($c >= '0' && $c <= '9')
     return ($c - '0');
   else
     return ($c-'A'+10);
}

You input the destination as a String, the pin as a number and the state as 0 or 1. Example:

$packet = assemblePacket("1337", 2, 1);

This would set pin DIO2 to high for the module with address 1337.

Update: Some things didn’t work before, especially if there were A-F values in the checksum, hence the dirty hack to get it to work. I know it’s not pretty but it works.

May 25

Converting HEX as a String to actual HEX values

Last night I spent quite a bit of time figuring out how to go from a string containing “7E00101700000000000000000013380244320520” which is an XBee API packet to actually writing those hex values to the XBee. The packet has been assembled with PHP and a database backing it.

That data was echo’ed onto an HTML page which an Arduino (with an Ethernet connection) parsed. Basically what I did was reading the string one character at a time, here are bits of the code:

byte incFrame[100];
byte c = 0x0;
 
c = client.read();
incFrame[stringPos] = c;
stringPos++;

As you can see I stored the data in a byte array. But when you want to write the data to the Serial line, you need to perform some operations to make it actually work. A long story short, here’s the solution, I’m sure other people have spent messing around with this problem in the past and will in the future.

byte getVal(char c)
{
   if(c >= '0' && c <= '9')
     return (byte)(c - '0');
   else
     return (byte)(c-'A'+10)
}

This is needed to properly convert the ASCII value to the hex value of each character. Next we put together 2 characters as is done with HEX notation and send the data:

  for(int i = 0; i < stringPos; i+=2)
  {
    byte sendb = getVal(incFrame[i+1]) + (getVal(incFrame[i]) << 4);
    Serial.write(sendb);
  }

And there you have it, a string containing hex values as ascii is properly converted into actual HEX. There are other ways to do it but this is how I did it.