Aug 14

Developing in PHP

Since July 1st I’m part of the “PC” team of Industria, Group T’s Engineering student organisation. I started right away by learning / refreshing some PHP stuff. It’s really not that hard when you already know a good bit of Java and C.

Anyway, the first webapplication I wrote was a second hand book selling system where members of Group T can sell their expensive books that they don’t need anymore. This being the first time I actually code something that roughly resembles a project in PHP I started out with several files for each view (your own list, add/edit book, list of available books, …) but soon I switched to a simple $_GET action magic, which made editing a lot easier.

As the new academic year is closing in I’m hoping people will start using it more as there are only thirteen books listed at the moment. Even though it’s a pretty simple application I’m proud of it :)

The second (bigger) project I started on is the famous 24h run application that Industria uses to keep track of things before and during the event. I have updated the database and tables that were used last year, removed a lot of unnecessary redundancy and duplicate code. New this year are achievements and badges, these are slightly different from points as their conditions to unlock them are somewhat more special than running a lap at a certain time below a certain duration.

This was a good opportunity to get back into building SQL queries and working with phpMyAdmin instead of using SQLyog. All in all there are currently nine personal and five team achievements. On a user’s profile they are loaded dynamically as they are grabbed from the database. Some generic ones such as “Get X amount of laps/points” can be easily added without any edits to the code.

Continuing this, the pages used during the event to register runners and keep track of laps and laptimes were quite messy as they were written very quickly one or two years ago while receiving no fixes or updates later on. I cleaned them a bit by using includes instead of having duplicate code all over the place. The laptime register page also received a few fail safe features that should help reduce the amount of incorrect registrations of laps.

While I was spending time coding all of these things I encountered many blank pages, internal server errors and such. Often it was because of a semicolon or a bracket that was forgotten or lost, sometimes very frustrating as showing errors was disabled on the server until very recently.

All in all a good start for a year full of PC-goodness!
Dec 20

Maestro MuzaBot

Every year at GroupT there are one or two so called Engineering Experience projects. These projects usually involve a team consisting of around five people from the same year. This semester it was time for ‘Engineering Experience III’.

I started off mailing people even before the start of the semester because I wanted a good, functional team to work with. My dreamteam was a group of only EA (electronics) students, but it was not possible partly because I didn’t know enough people who are going to do EA starting next semester besides a couple of friends.
After a few requests and another handful of e-mails the composition of our team was finalized. Diversity  all around with two biochemical, one electromechanical and two electr(on)ical engineering students.

The objective of this project was to create a machine or robot that could be controlled by a computer using LabVIEW, Computer Based Control. Joy for the EA folks, a little less happiness at the other quadrants of the GroupT spiral. Nonetheless, no one has died from this course yet so there we were, trying to come up with a cool and realistic idea.

After an hour of brainstorming or so we had a couple ideas written down on the blackboard. Some were too hard to even consider them, others were too silly or too easy. Being a musical person myself I proposed a robot that could play some instrument, just like The Trons. Eventually everyone agreed and we quickly decided to use a metallophone  and some homemade drumming construction.

After over hundred hours (per person) of working on the software, construction and electronic circuits the result is pretty satisfactory. It could’ve been a better had we not neglected deadlines a couple of times (not gonna happen again, ever!) as we had to rush some things in the end to make it ready for the presentation.

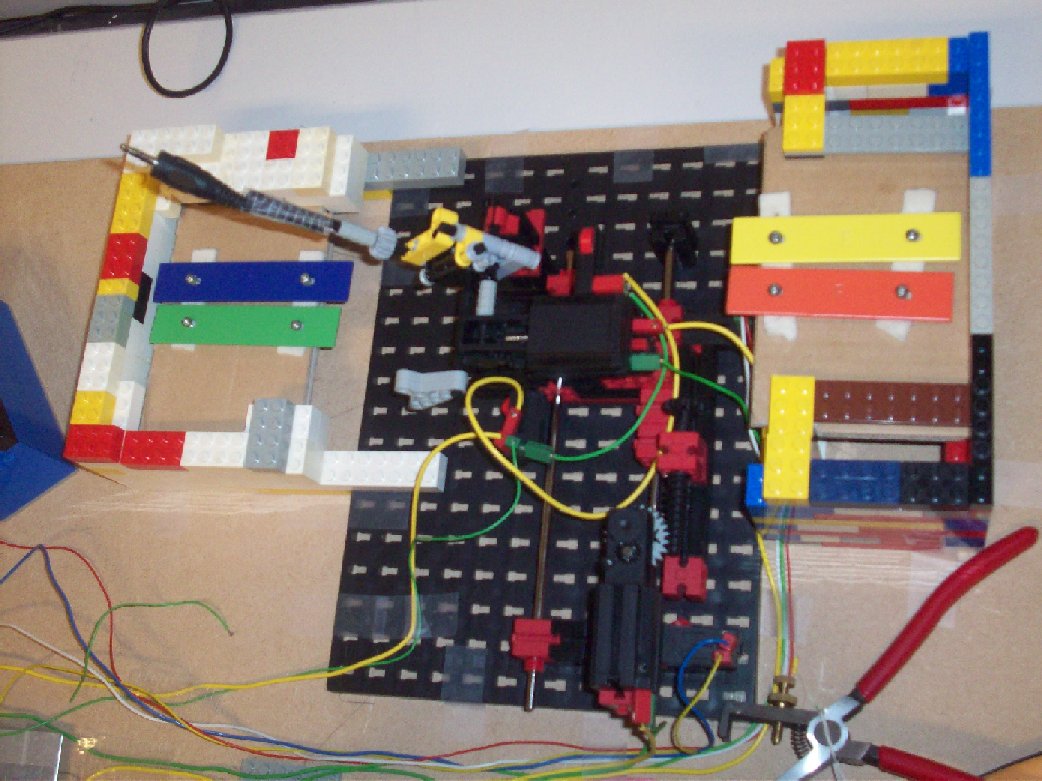
The construction of the modules consist of Fischertechnik, LEGO and LEGO Technic blocks. Since those don’t always fit flush together we had to glue some things to make it work. The big parts are

The Read Module

Read Construction

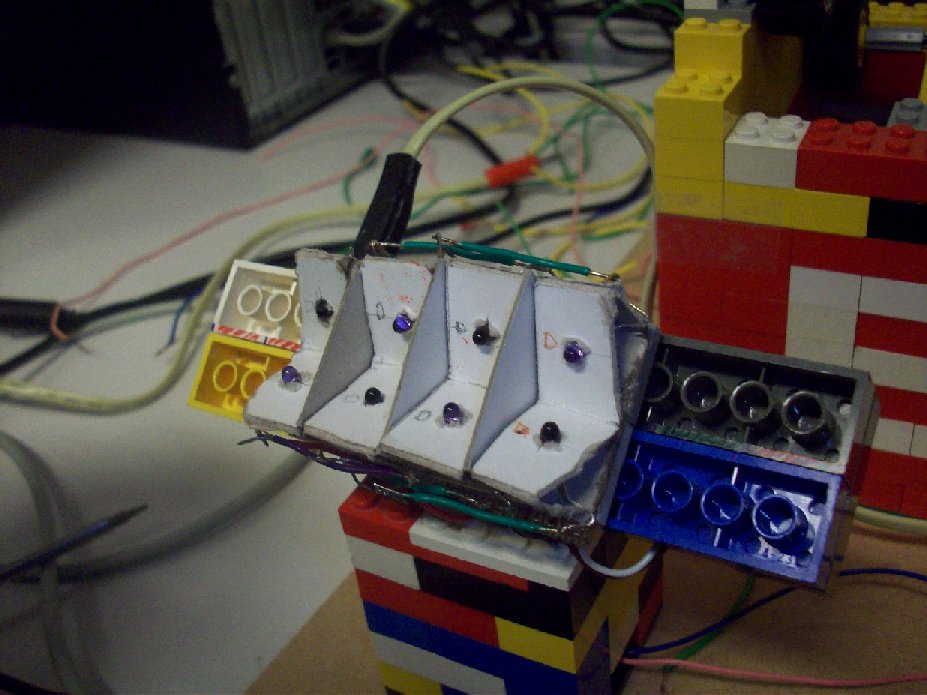
This part of the robot can read homemade music sheets which it translates to numeric values so LabVIEW knows how to handle it. This is achieved by using a set of IR-LEDs and IR-receivers (photo-transistors) . You feed the construction (not shown) a music sheet, it’ll detect it and start pulling it in. Once the sheet has gone through the reading part the motor automatically stops.

The Metallophone Construction

Metallophone


Next up is one of the two modules who take care of reproducing the music. This part contains 2 motors, four musical tones (C, D, E and F) and a couple of switches. Based on what is in the arrays the hammer will first move on the x-axis to the correct position and then move in an arc-like motion to ‘slam’ on the metallic plates. A bonus thing is, both this and the drum module are ‘in sync’ as they will hit their respective target at the same time.

The Drum Module

Drum

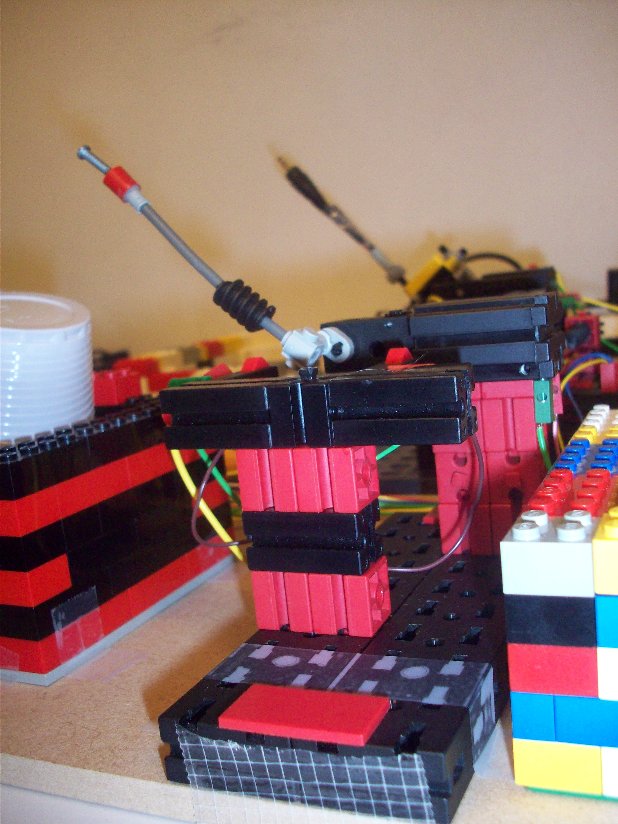
The  drum can either hit a metal can or a plastic cup. This is the simplest construction of the robot as it only uses one motor and two switches put in parallel. As mentioned before, the hitting takes place as soon as the x-axis of the metallophone signals it’s ready to start the “hit” sequence.

The PCB and DAQ

PCB


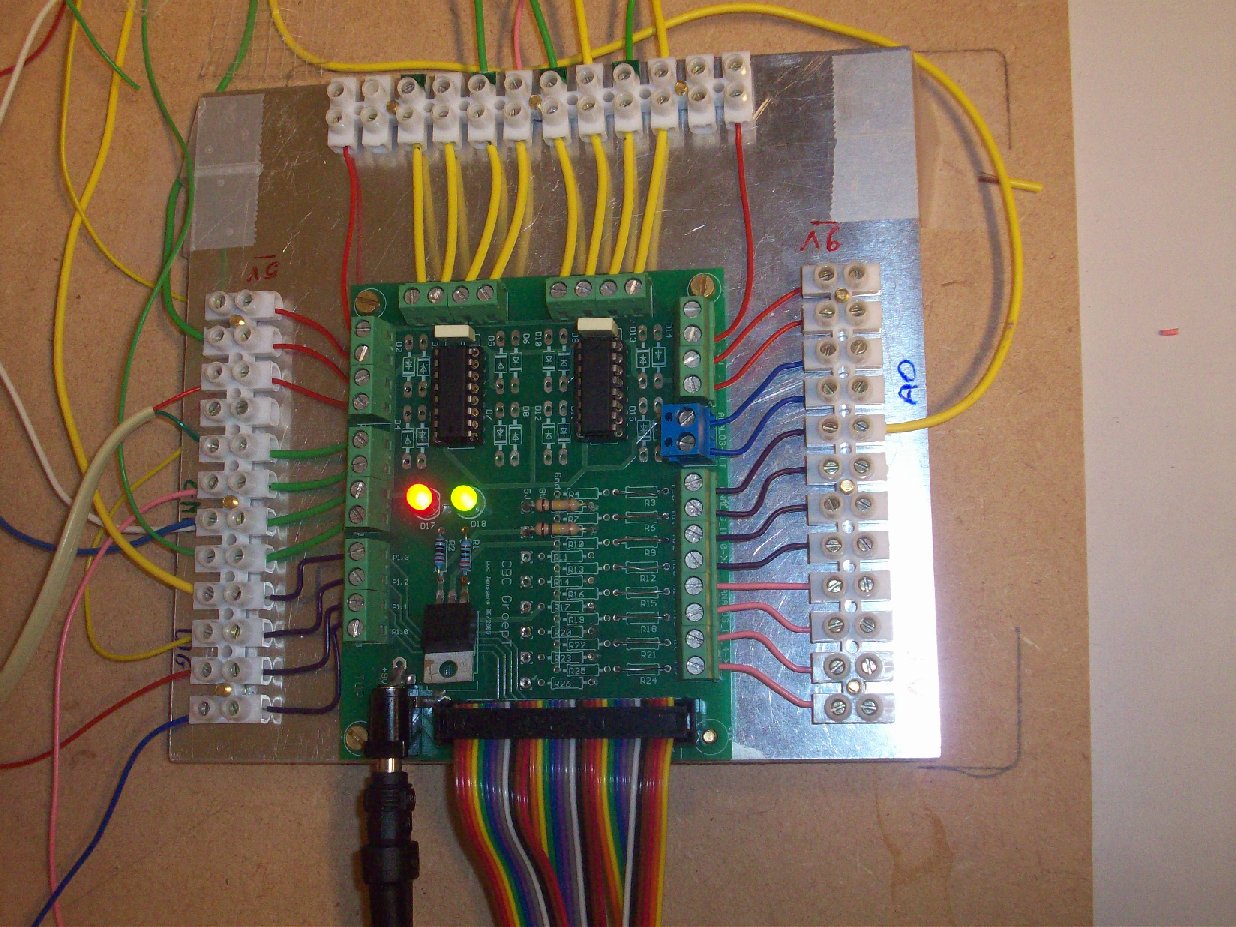
The missing link between the modules and LabVIEW on our computer is the actual PCB which every electronic component is connected with. This specially designed for this course circuit board contains some basic things such as 9V and 5V voltage sources as well as other in and out gates. Another interesting component is the H-bridge so we could easily make the motors run in both directions.

Aside from this PCB, we also had a National instruments DAQ card, the 6008-USB. This DAQ-card was hooked up with a computer which runs LabVIEW. It’s relatively cheap but it’s got more features than we could’ve asked for.

GUI

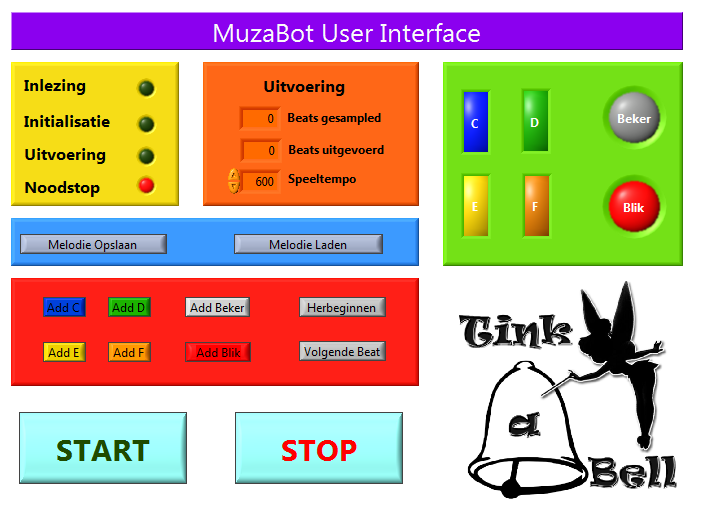
Actually using and controlling the robot can be done through a GUI I made. Here you can see what is going on (yellow part), how many beats are ready to be played and how many have already been played (orange) and the virtual representation of what is being played (green).
The blue and red parts are the areas where you can either save/load music or enter your own tunes. This makes a total of three ways to add music information into the robot.

This project was a lot of fun in my opinion, and I’ve learnt a lot by designing the program in LabVIEW and helping with the construction of the different modules. Last but not least, feel free to check out the following video of the machine in action (sorry for the crappy audio/video quality!)